If this is your company, CONTACT US to activate Packbase™ software to build your portal.
At some point in the lives of nearly all children, they decide that dinosaurs are the coolest things EVER. To be honest, they’re right. Dinosaurs are pretty incredible. Enormous beasts that ruled the earth, then suddenly went extinct and left their skeletal fossils behind? What is cooler than that? Maybe plastic!
Dinosaurs, Fossils, and Plastic
What do dinosaurs and plastic have in common? Let’s examine the obvious: fossils. When dinosaurs died millions of years ago, they left behind their bones. Over time, these bones were buried, filled with groundwater, and turned into fossils. Around that same time (give or take a few million years), plants and other organic material (organisms like phytoplankton and zooplankton) also died and got buried under layers of sediment. These, however, didn’t turn into pretty fossils like the dinosaur bones. Instead, the plants and tiny animals were crushed under tons of pressure, resulting in a chemical change. The pressure and resulting heat turned the dead organic material into fossil fuels.
You still might be wondering, but what does this have to do with plastic? Well, let’s take a quick travel back in time. Not to dinosaurs (darn!), but to a past blog series. Plastic 101,Plastic 102, and Plastic 103 teach us all about how it is made. In 102, we learn about how plastics are made from crude oil and natural gas. And what are crude oil and natural gas? You guessed it: fossil fuels! So plastic is made from decomposed, prehistoric organisms. Some dinosaurs might have feasted on the same type of plants that made the fossil fuels that made the plastic that is in the disposable fork you’re eating your lunch with today. Isn’t it amazing how a little bit of plastic can create a connection between you and those amazing creatures? Next time you go to the natural history museum, pause for a moment as you gaze upon those towering skeletons. Every day, you use plastic that started as a plant millions of years ago.
If you want this month’s calendar wallpaper, you can find Jurplastic World here. The rest of CPS’s calendars are also available here!
Parents, are you getting ready to cut the apron strings? Is your firstborn (or second-, third-, or fourth-born) child getting ready to leave the nest? When your children move out on their own, whether heading for college or life in the real world, they need a little bit of help. They may not want to admit it, but they do. Here at Container & Packaging Supply, we are going to give you a few ideas for helping your child take those first steps out on their own.
Today, let’s focus on the physical needs of your fledgling adult. When I was a college student, my main concerns were passing my classes and meeting boys (the order of importance varied from year to year, as was evident by my grades). I never thought about emergency preparedness. Food storage? 72-hour kit? Evacuation plan? None of those even crossed my radar. So what would have happened if an emergency did strike? I would have been far from ready. I am pretty sure that I was a fairly normal college student and, like I was, most students aren’t thinking about plans for disasters. If you are a mom or dad, you can help your almost-adult child by building him or her a small first aid kit.
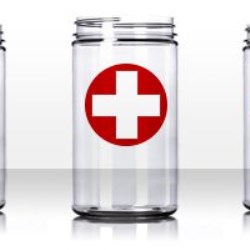
There are countless ways that you can bundle up your emergency supplies. But for college students, you need something small because students’ dorms are tiny. The container should be sturdy, one that can handle being moved from apartment to apartment. You also should consider clear packaging so that your child can quickly see what is in it. And in case of a natural disaster, you’ll want a container that can handle a flood, an earthquake, or even a tornado. You can easily build your kit using a clear plastic jar like this 32-ounce jar. It is large enough to fit some essential first aid supplies, but not so big that it will take up lots of your student’s precious space. It is made of PET (polyethylene terephthalate), and is durable with a high impact resistance. It can withstand temperatures from -40° F to 120° F, so it will be okay unless a volcano erupts underneath your child’s dorm. If you get a lid with a liner (like this one), you can make your kit water resistant from catastrophic flooding.
Now that you have a functional container, what do you pack into it? Here are a few recommendations for a first aid kit from the Red Cross:
- Adhesive bandages (assorted sizes)
- Scissors
- Roller bandages
- Absorbent compress dressings
- Aspirin
- Sterile gauze pads
- Thermometer
- Tweezers
- Nonlatex gloves
- Antibiotic ointment
- Adhesive cloth tape
- Antiseptic wipe packets
- Hydrocortisone ointment
This is not a complete list, but might give you a place to start creating your own first aid kit. You should also consider that if your child requires medication, you should pack a small supply of that in the kit.
If you enjoy crafts, you can personalize your child’s emergency kit with glitter, stickers, or whatever else you desire. If you’re not, just throw an adhesive label on top and write “First Aid Kit” on it. Hopefully, your student won’t ever have to use the kit. But if it is necessary, it is best to be prepared!


